 epoxyresin
Make the design measurable
A river table combines woodworking, mold building and a substantial resin casting. Start with a drawing showing the final table size, slab arrangement, river width and intended thickness. Mark knots, cracks and undercuts that connect to the river. Decide which face will be visible and how much material will be removed during flattening.
Keep the intended base and attachment method in the plan. A resin river is not, by itself, an engineered guarantee that two slabs and a particular base form a safe structure. Large or load-bearing designs may require woodworking or structural expertise beyond a decorative casting tutorial.
Choose the resin around the actual casting
Select a casting system approved for the river’s depth, total pour volume and workspace conditions. EcoPoxy and TotalBoat publish river-table processes for their own products, but their numerical limits and ratios are not interchangeable. Check the current instructions rather than relying on a video made for an earlier formulation.
Calculate quantity by dividing an irregular river into measured sections. Include connected cavities and separate allowances for sealing and finishing. Then turn the total into a batch and layer plan that satisfies the chosen resin’s limits. Purchasing a large kit does not imply that its entire contents belong in one mixing container.

Compare a relevant resin kit
TotalBoat Fathom: check the selected 1.5 gallons kit, included components and current offer. Read the formula limits before choosing it for your project.
As an Amazon Associate I earn from qualifying purchases. We may earn a commission from the paid links on this page. How affiliate links work.
View 1.5 gallons kit on Amazon ↗Prepare the slabs and prove the mold
Follow the product guidance for dry, sound wood. Remove loose bark and material that cannot provide a reliable bonded surface. Plan sealing for the relevant edges, end grain and cavities. Keep an offcut for testing pigment, sealing and the final finish together.
Build a rigid, level mold using materials and release methods compatible with the resin. Inspect every seam, corner and fastener penetration. Arrange appropriate secondary containment before the pour. If you perform a leak check, use a method that does not leave the mold or slabs wet or contaminated before resin is introduced.
Rehearse the pour without resin
Set the slabs in place, establish approved restraint against movement and check access to the entire river. Walk through mixing, pigment addition, pouring and tool placement. Confirm that the mold can remain level and undisturbed during cure. The rehearsal should expose awkward reaches and missing supplies while there is still time to correct them.
Write a batch sheet with the component quantities, ratio basis, layer targets and planned timing. Color samples should use the same product and intended additive loading. Keep enough matching material for the planned process, and note how a second batch will be matched if your design spans multiple pours.
- Geometry ready: measured river, deepest cavity and final machining allowance.
- Containment ready: level support, compatible release system and inspected seams.
- Chemistry ready: current product instructions, component targets and approved pour sizes.
- Environment ready: stable cure conditions and controlled access to the workspace.
- Finishing ready: demold, flattening, sanding and final-coat sequence.
Allow for finishing before promising a deadline
Demold only at the manufacturer’s permitted stage, using enough support for the size and weight of the assembly. Plan machining and sanding around the required cure, with suitable dust collection and protection. Decide whether the final surface will be polished casting resin or an approved additional coating; these are different finishing routes.
Inspect for leaks, voids, cracks and bond defects before mounting the base. A glossy topcoat cannot establish that an unseen defect is harmless. Keep process notes and photographs, especially if the table will be sold. Communicate care and service limits based on the actual finish system, including heat and sunlight restrictions, without promising scratchproof or permanently colorless performance.
If the finishing plan includes trimming the cured tabletop to a straight outline, the track saw system buying guide helps compare rails, work support and complete setup costs. Confirm the resin, saw and blade manufacturers permit the actual material and operation before selecting equipment; a woodworking saw listing is not approval to cut every cured resin.
Choose the formula, then the kit size
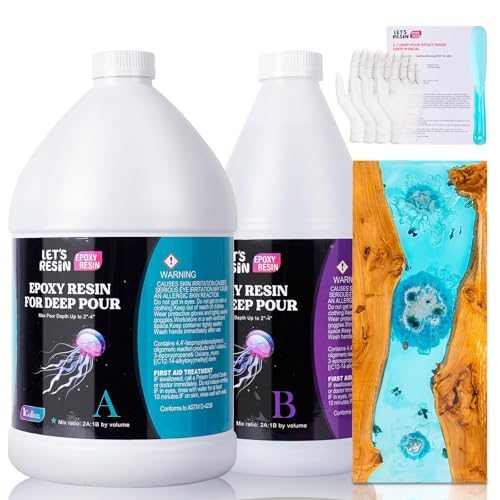
LET'S RESIN Deep Pour Epoxy: check the selected 1.5 gallons kit, included components and current offer. Read the formula limits before choosing it for your project.
As an Amazon Associate I earn from qualifying purchases. We may earn a commission from the paid links on this page. How affiliate links work.
View 1.5 gallons kit on Amazon ↗Sources & further reading
- TotalBoat: river table project guide
- EcoPoxy: building a river table
- EcoPoxy FlowCast product specifications
- TotalBoat: how deep to pour epoxy
Manufacturer documents can change. Match the full formula name and kit instructions. This page is based on document research, not our own product testing.